
Your client has attended their session, you’ve written their session note. The next big step is to bill your client! Owl Practice creates two types of billing records for your clients: Invoices and Receipts. Invoices and Receipts are both financial records indicating money transferring hands, but they happen at different points and in different directions:
Invoices are for you (the therapist) to show that you have done work which requires payment. You give this to a client to request that they pay for your services.
Receipts, on the other hand, are generated when your client actually pays you - it's the proof that they did, in fact, pay you. They may not require receipts, but for good finances, we will still generate them for you.
Generate an Invoice:
Step one in billing is to create your invoice and supply it to the client. By default, you will have a feature called Auto-Invoicing switched on. This means that once you mark a session's attendance, an invoice will automatically be generated. If you want to turn off Auto-Invoicing, head to this FAQ post.
Here are the quick steps to billing a client for a session.
- Mark attendance.
- You can do this by clicking on the Calendar session and using the Attendance Icons.
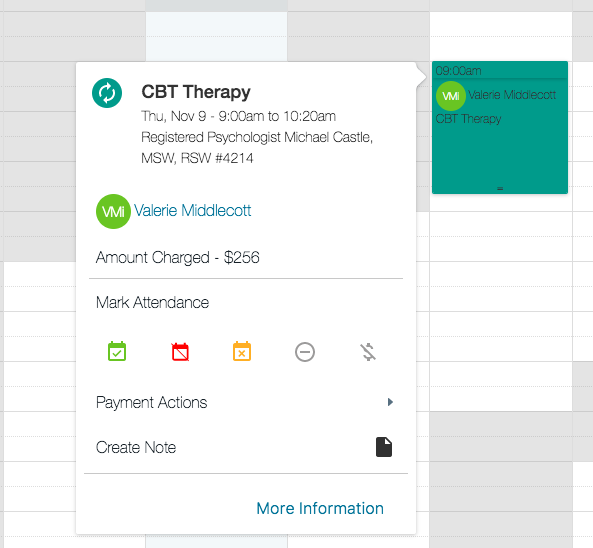
- You can do this by clicking on the Calendar session and using the Attendance Icons.
- Marking the session as Attended will automatically create an invoice for the session. You can supply this to your client via email, print a physical copy, or export it as a PDF.
- Generating an invoice also updates the Balance Owing for the client for the value of that session.
Once your client pays you, step two in billing is to Record a Payment and generate a receipt.
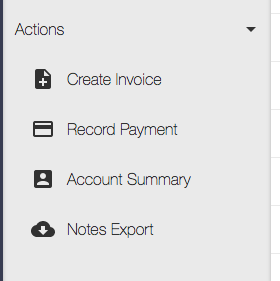
- Head to the Client Account for the client that has paid you.
- Under the Actions side bar (on the left) click Record Payment.
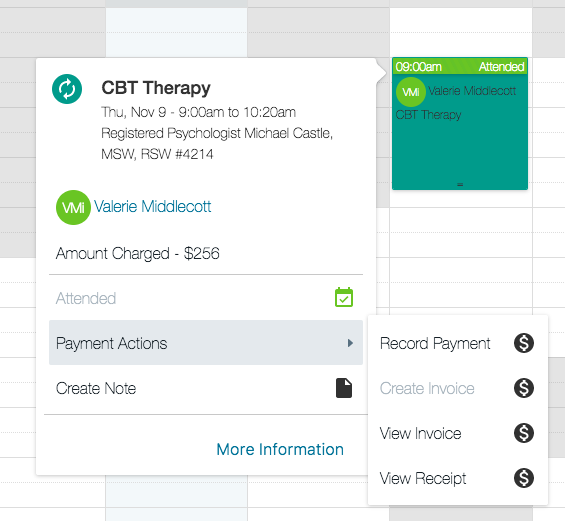
- You can also do this by clicking on the Calendar session, opening the Session Overview Window and clicking Record Payment.
- Enter in the Payment Amount and Payment Date. Add any additional comments that need to be included on the receipt, and press the green Record Payment button.
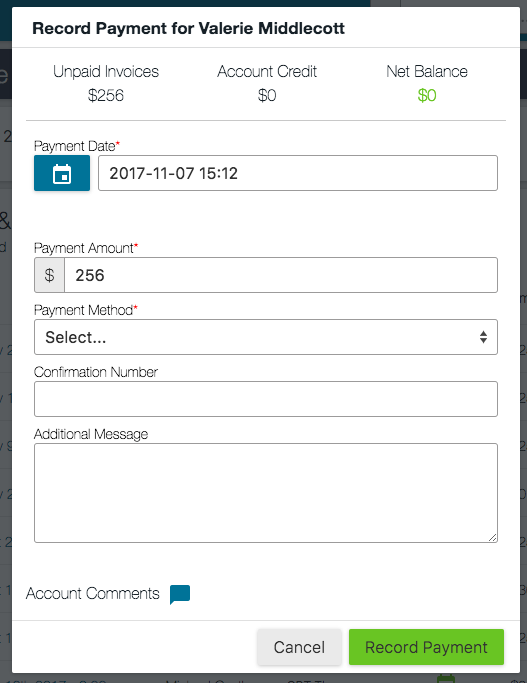
- This will automatically generate a receipt and update the Balance Owing for this client. You can supply this to your client via email, print a physical copy, or export it as a PDF.
Owl’s billing streamlines the process to generate account credits, create invoices for charges not related to sessions, and will even create account summaries for you. Read more about Billing in Owl here.
That's the final step in the Getting Started Guide! We hope this quick introduction helps you start using Owl right away, but please contact us with any questions along the way. Practice Wisely!