
To start booking clients you need to schedule them in your Calendar.
You need two things to create a session: a client name and a service.
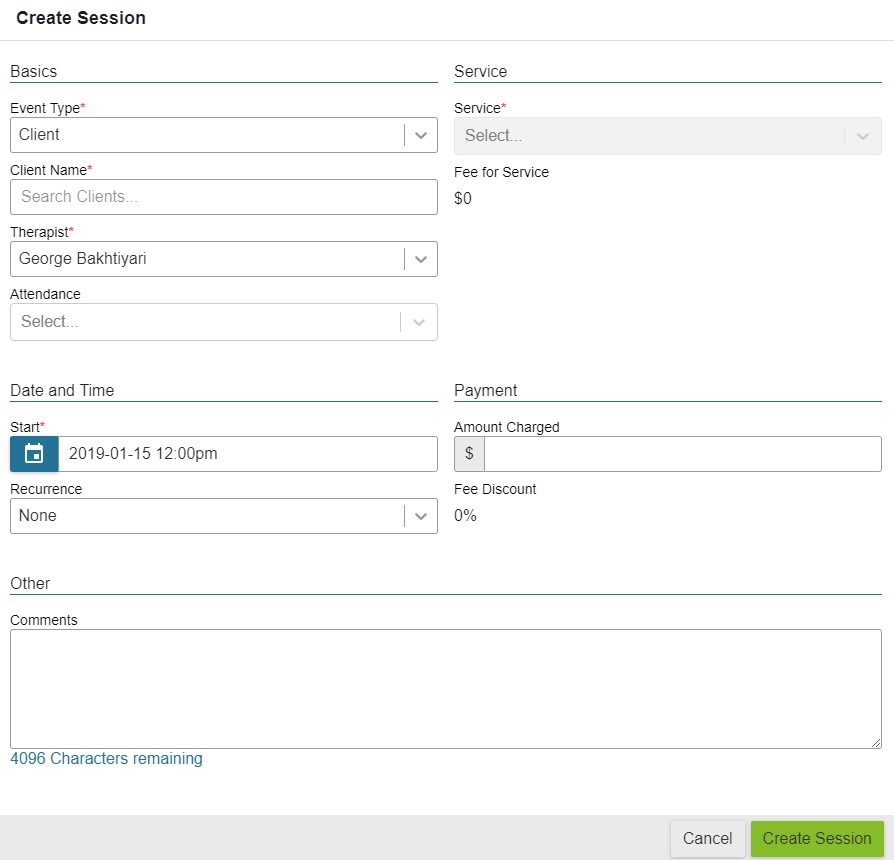
- Head to your Owl Calendar!
- Click on the date and time you want to schedule the session.
- You will automatically see the Create Session Window.
- Enter the Client Name name in the appropriate box - notice that Owl searches your Client list and find the most likely candidates as you type.
- Select the Service for this particular session.
- Click the green Create Session button at the bottom of the window.
The session will now be entered on to your calendar as a new entry!
Booking Personal or Unavailable Time
If you have to block off regular business time for a personal/professional development and cannot take clients (in other words, outside of your normal availability, you can add a new session to your calendar for that purpose. The only difference in process is to change the Event Type of the session from Client to either Personal or Unavailable and then fill out the appropriate fields.
Read our comprehensive Sessions FAQs here!
Next step: write your Session Note!