
Overview
Owl's new split session charges feature allows you to split the cost of a session across multiple payors. Clinics can use this feature to designate other individuals or parties as responsible for partial or full payment of client charges in any amount needed. For instance, clinics who work predominantly with children may need to book a session in the child’s name, but then bill a parent or guardian for the session. Or, if you’re dealing with a family or group style session and all of the parties want to pay for a portion of it individually, you could split the amount due for that session among each of the attendees accordingly. The balance owing will still be reflected in the primary client’s profile, but the invoices and receipts will now reflect each individual payor’s amount owed. This feature is beneficial because it allows for more refined balance owing granularity and payment collection.It is important to know that this feature only allows for the splitting of session based charges; non-session charges or other billables are not eligible for splitting among multiple payors.
To split sessions charges, you must work from a booked session that has attendance status marked and has been invoiced. It is important to know that only one session’s amount can be split at a time. If you have an invoice with multiple sessions present, you cannot split charges from all of these sessions in one action; you need to select one session from the invoice and split it. This is because charges are split on the session level, not the invoice level.
Session Charge Splitting Criteria
It is also important to know that the following criteria must be met before a session charge can be split:- The session must have attendance marked either Attended, Late Cancel, or No Show
- The session must have an invoice associated to it prior to splitting the charge
- The session cannot have any existing partial or complete payments associated to it
- The session cannot have any existing refunds associated to it
- The primary client on the session must have at least one contact associated to their profile in their Circle of Care (it can be either a linked account or alternate contact)
Splitting a Session Charge
The Split Session Charge action can be completed from these areas in Owl (only if the session selected meets the criteria to be eligible for splitting):- A booked session in the Calendar
- The Sessions & Notes tab within a Client Profile
- From within the Invoice PDF Preview window
Splitting from the Calendar:
If you have booked a session in the Calendar for a client that has a Linked Account or Alternate Contact on file, you will need to mark the attendance for the session and create an invoice. Follow these steps to split the session charge:
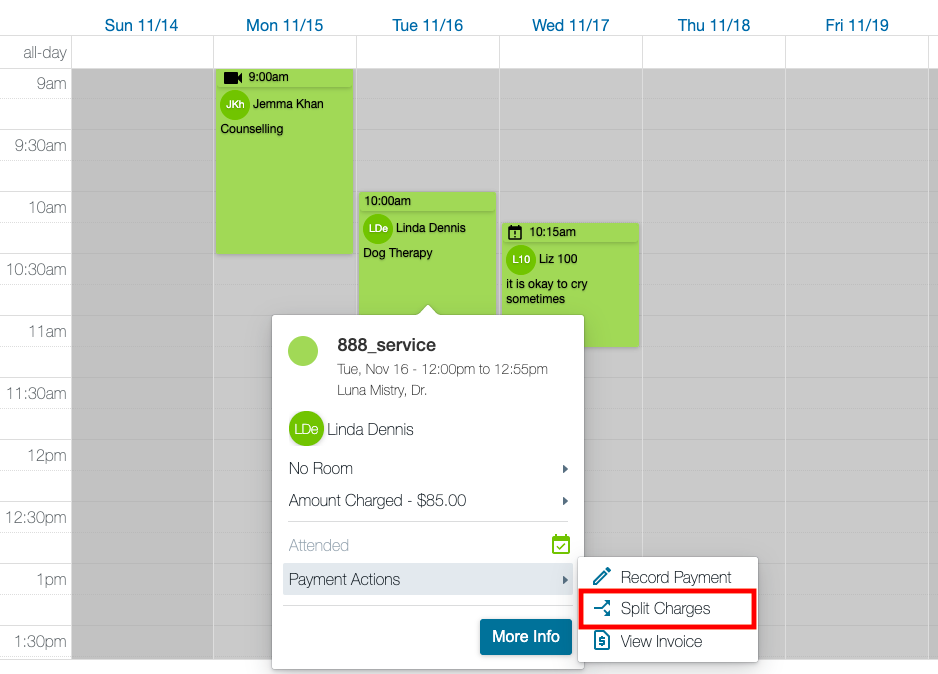
1. Click on the session and select Payment Actions > Split Charges:
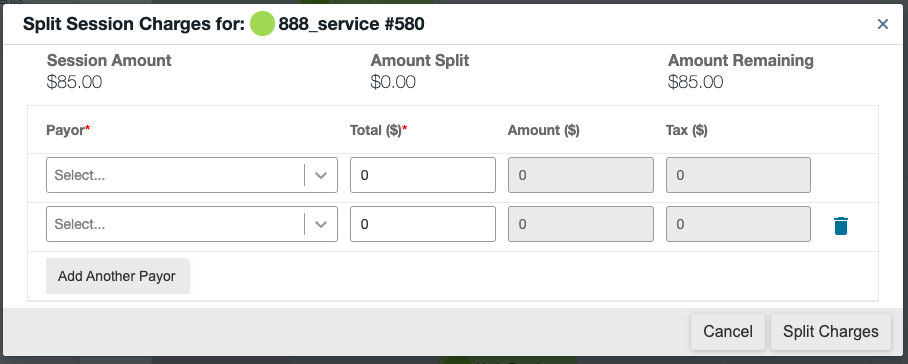
2. The Split Session Charges window will open:
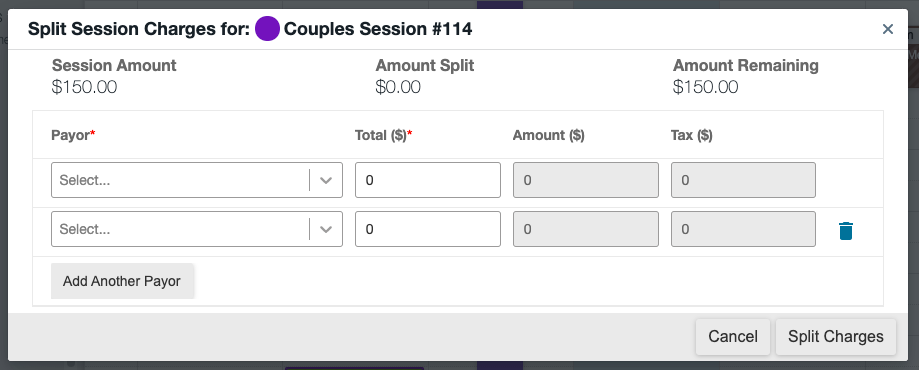
3. You will see Payor drop down boxes that when clicked display the primary client’s name and any Linked Accounts or Alternate Contacts currently listed in their Circle of Care. You can click Add Another Payor to split amongst more payors (if more are available), or remove any unneeded payors with the Delete icon (at least one must remain):
4. You can choose a payor and then enter the dollar amount of the charge they will be assigned. The amounts you input among all of the payors must add up to the total amount due for the session. If the session charge total is $150.00, you have to assign the entirety of the $150.00 charge between the payors selected:
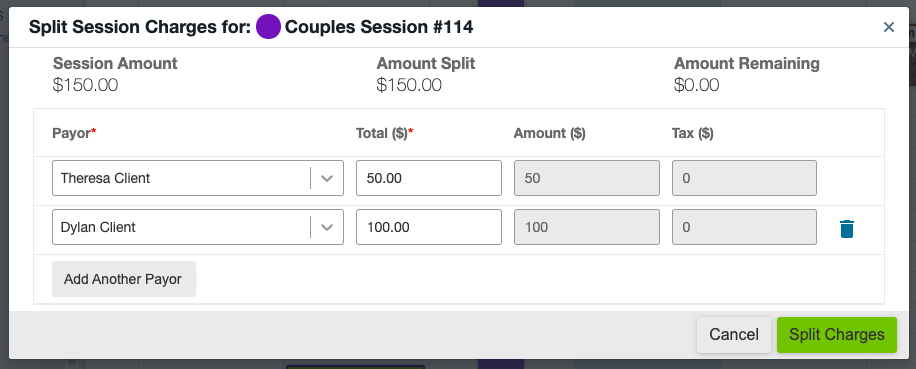
Please note: You can only enter a dollar value in the Total ($) field. The Amount ($) and Tax ($) fields will always be greyed out. If the session you’re splitting is taxed, the tax will be calculated proportionally to the amount input into the Total ($) field.
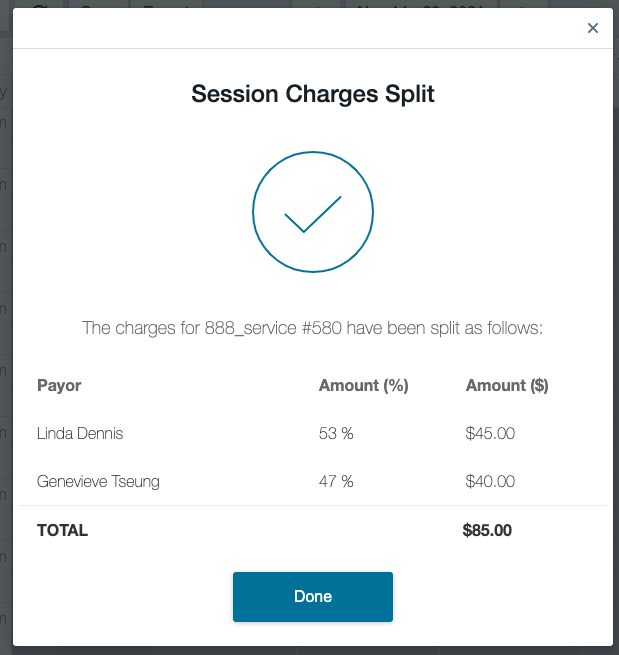
5. Once the amounts have been assigned and the total is correct, click the “Split Charges” button.A confirmation prompt will appear to let you know that the charges have been split successfully among all of the payors:
Splitting from Sessions & Notes Tab:
Session charges can also be split from within a Client’s Profile. Follow these steps to split a session charge from within a Client Profile:
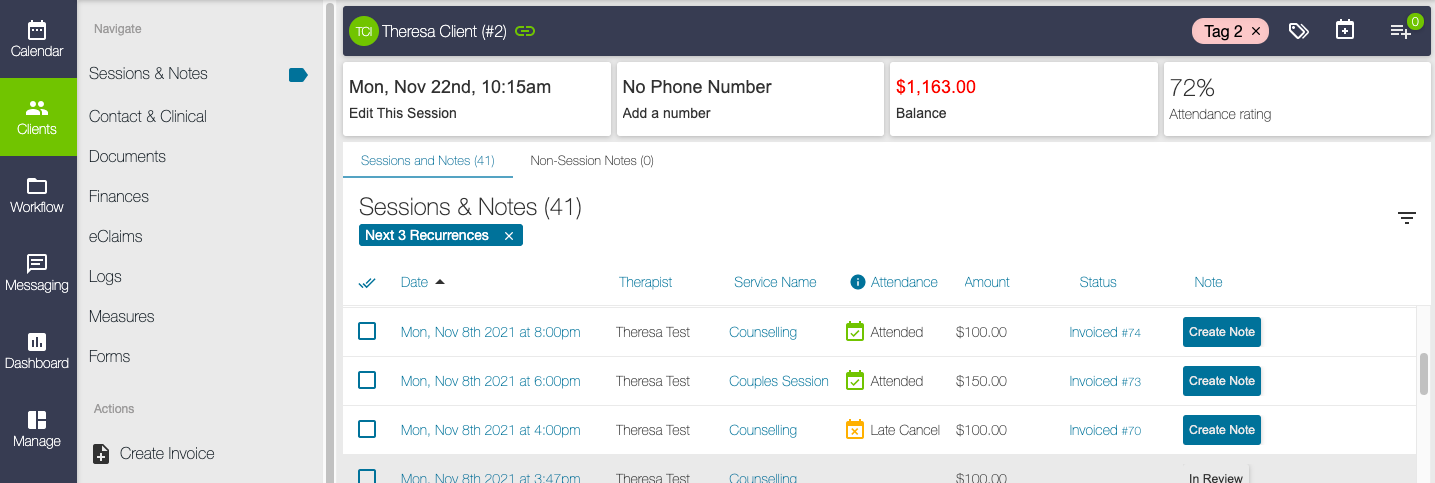
1. Open a client profile and go to the Sessions & Notes tab. Here you will see all of the past and future sessions that have been booked in their name:
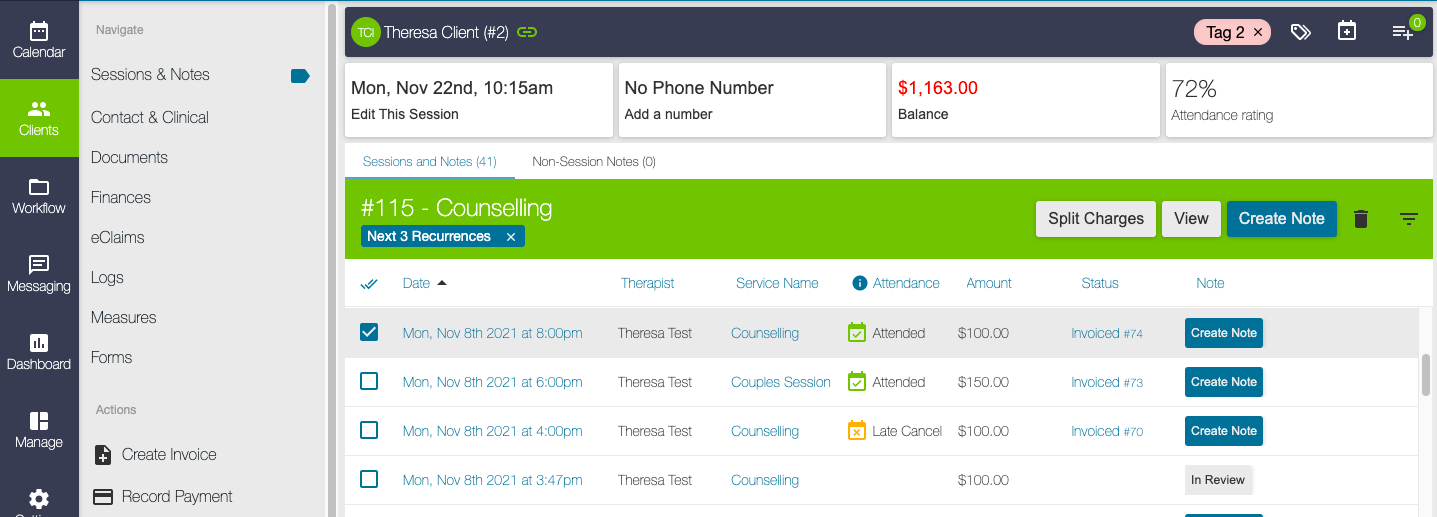
2. When you select a session, you’ll be able to see if it’s eligible for session charge splitting if the “Split Charges” button appears. Click this button:
3. You will see Payor drop down boxes that when clicked display the primary client’s name and any Linked Accounts or Alternate Contacts currently listed in their Circle of Care:
4. You can choose a payor and then enter the dollar amount of the charge they will be assigned. The amounts you input among all of the payors must add up to the total amount due for the session. If the session charge total is $150.00 you have to assign the entirety of the $150.00 charge between the payors selected:
Please note: You can only enter a dollar value in the Total ($) field. The Amount ($) and Tax ($) fields will always be greyed out. If the session you’re splitting is taxed, the tax will be calculated proportionally to the amount input into the Total ($) field.
5. Once the amounts have been assigned and the total is correct, click the “Split Charges” button:
6. A confirmation prompt will appear to let you know that the charges have been split successfully among all of the payors:

Splitting from Invoice PDF Preview Window:
Session charges can also be split from within the Invoice PDF Preview window as long as the invoice you are viewing has one session on it that meets the session splitting criteria. To split session charges from the Invoice PDF Preview, follow these steps:
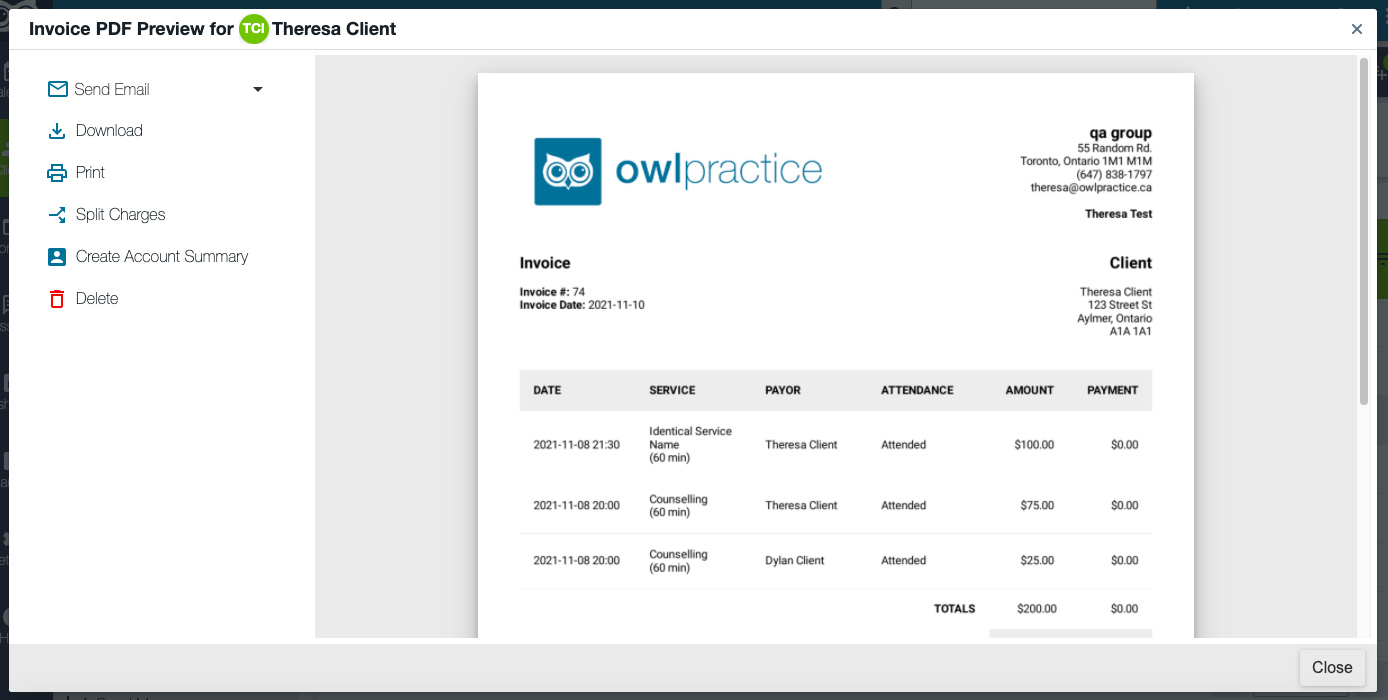
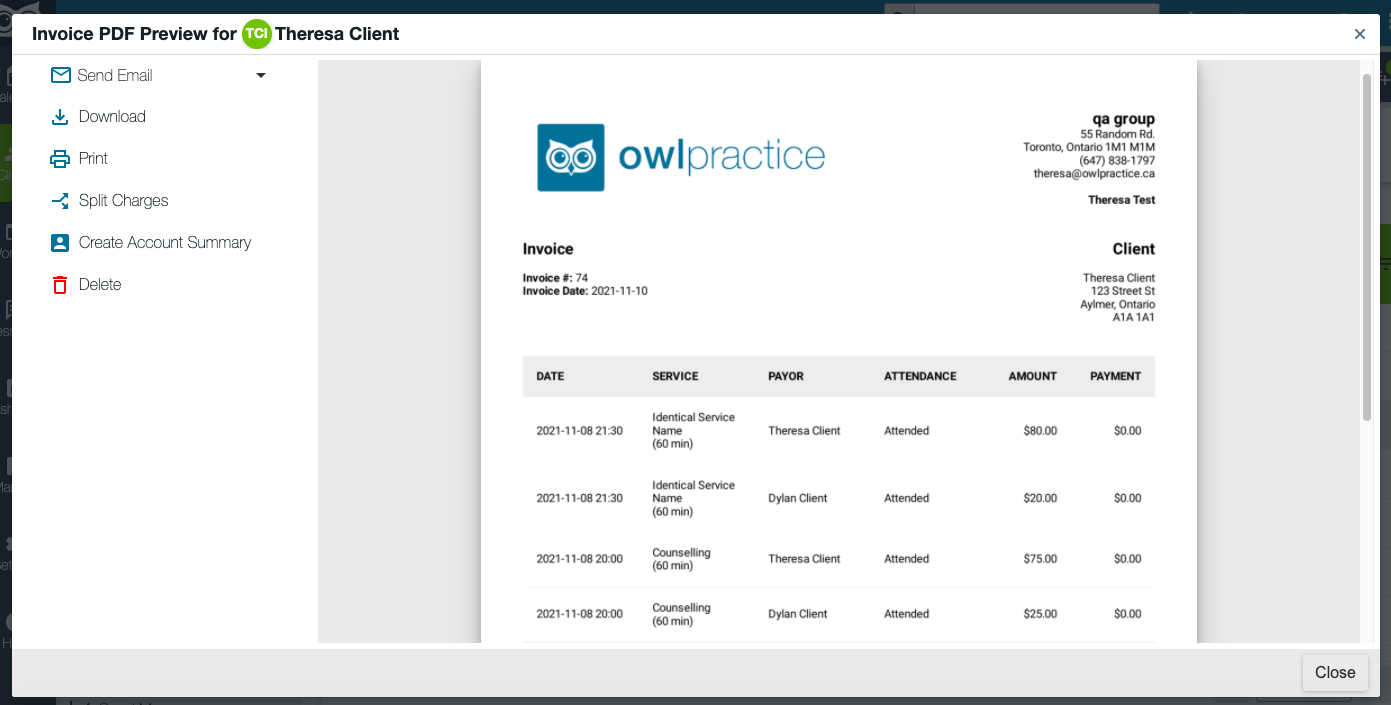
1. Open a client’s invoice. If there are charges that are eligible to be split, you will see the Split Charges option in the sidebar:
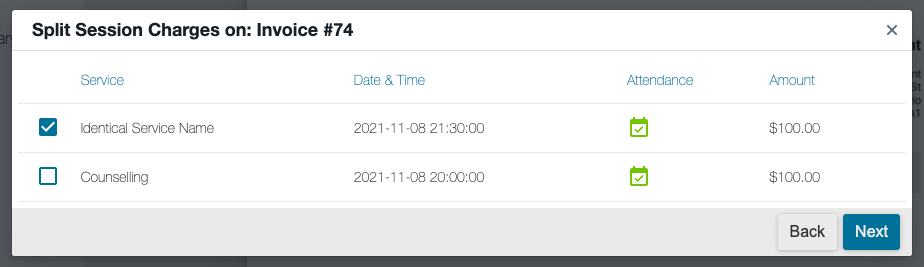
2. Click the Split Charges option. All of the sessions within the invoice that are eligible to be split will be displayed. Select one of the sessions and then click Next:
3. You will see Payor drop down boxes that when clicked display the primary client’s name and any Linked Accounts or Alternate Contacts currently listed in their Circle of Care:
4. You can choose a payor and then enter the dollar amount of the charge they will be assigned. The amounts you input among all of the payors must add up to the total amount due for the session. If the session charge total is $150.00 you have to assign the entirety of the $150.00 charge between the payors selected:
Please note: You can only enter a dollar value in the Total ($) field. The Amount ($) and Tax ($) fields will always be greyed out. If the session you’re splitting is taxed, the tax will be calculated proportionally to the amount input into the Total ($) field.
5. Once the amounts have been assigned and the total is correct, click the “Split Charges” button:
6. A confirmation prompt will appear to let you know that the charges have been split successfully among all of the payors:
7. After a charge has been split via the Invoice PDF Preview window, the invoice you opened will update in real time to reflect the updated charges for the session that you just split:
After a Session Charge is Split
When a session charge has been split, keep in mind the following:- A confirmation window will appear after a charge has been successfully reallocated between payors, detailing amounts and percentages of the split
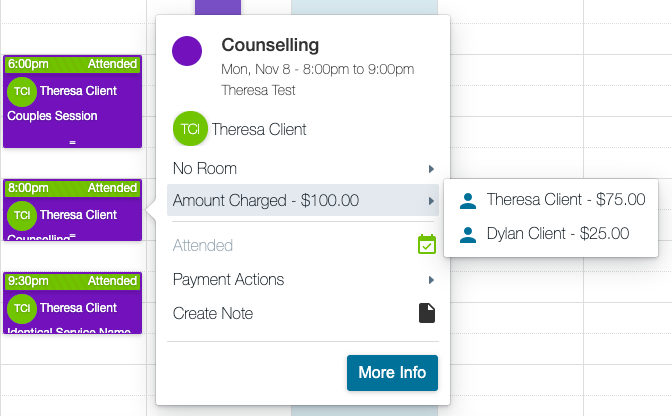
- You can see if a session charge has been on the session level if you click on the session and hover over the Amount Charged field on the Calendar Event. The amount of the split will be displayed per each payor:
- The split will also be reflected on invoices. The Duration information will be condensed with the Service information and in its place you will see a Payor column, showing the amounts owed per payor, per charge
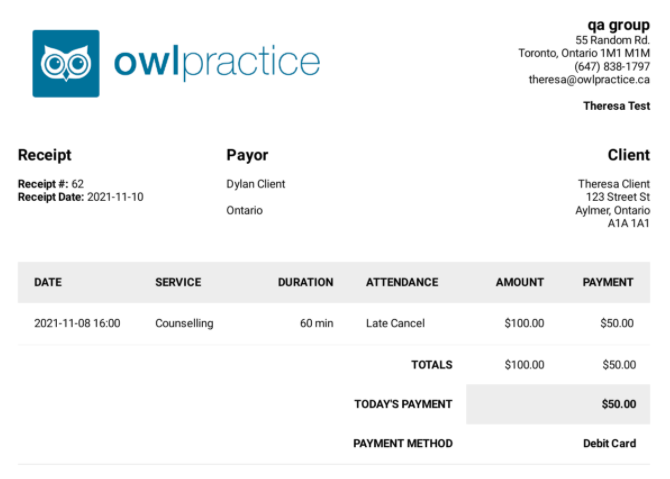
- There is a new payor subheading on Receipts - however, it will only appear if the payment was made by someone other than the primary client:
Important Details About Splitting the Charge
There are a few other important things to keep in mind about this feature and how it works:- You are able to split the amount and tax charged for a session as many times as there are available payors. For example, if the Primary Client has 3 possible payors in their Circle of Care, you could split the session 2, 3, or 4 different ways but not 5. This includes the Primary Client as a payor when splitting. The Primary Client will always appear as a payor option when splitting session charges
- You are able to add and remove as many rows as there are payors in the Primary Client’s Circle of Care. By default, the Split Session Charges window will display two payor fields. You can click the “Add Another Payor” button to add more as needed.
- The split must add up to the total session amount or you will not be able to split the session charge.
- If the session you’re splitting is taxed, the tax will be calculated proportionally to the amount input into the Total ($) field per payor.
- You cannot allocate two separate charge amounts to the same payor. For example, you cannot take a $100 charge and split it to have $50 assigned to Payor A and the remaining $50 assigned to Payor A again.
- If you choose to delete a Linked Account connection or Alternate Contact from a client’s Circle of Care, and they have a balance owing from charges that have been assigned to them that haven’t yet been paid, the unpaid balance will be reallocated under the Primary Client’s name.
Recording a Payment
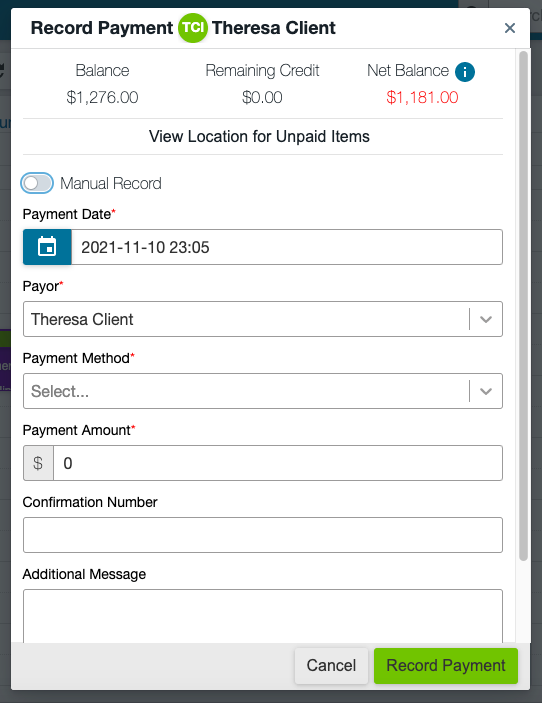
Since the feature overlaps with recording payment actions, some changes have been made to this functionality:- A required Payor field has been added to both the automatic and manual record payment windows
- Automatic Record Payment Window:
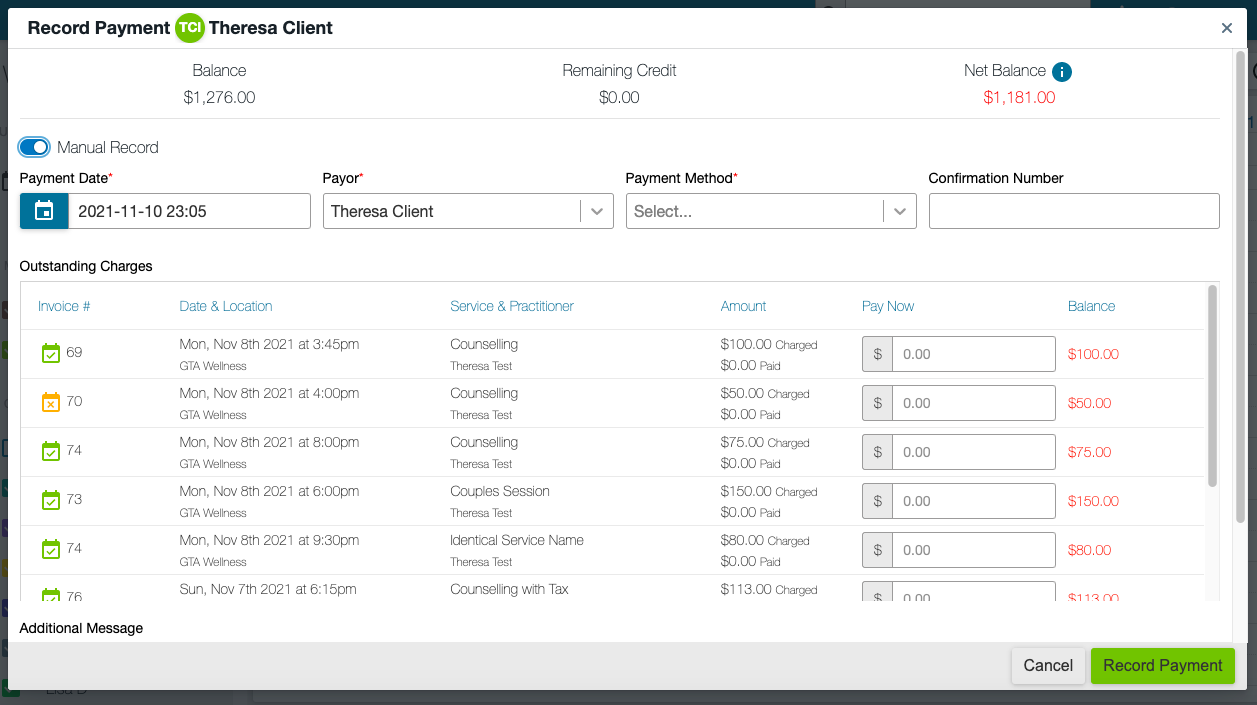
- Manual Record Payment Window:
- Automatic Record Payment Window:
- Payments can only be made for one payor at a time. You cannot list multiple payors in one record payment action.
- If you change the Payor listed in the record payment window, the display will change to show the amounts owing relative to that payor. The Balance, Credit, and Net Balance fields at the top of the window will display data for the Payor selected.
- Payors can generate and use credit on the Primary Client’s account
- If you are in the middle of recording a payment and have input amounts to be paid, changing the payor field will reset all amounts entered. Data entered into fields such as payment method, confirmation number, and additional message will persist when the payor is changed. This is important to keep in mind because payments can be made under the payor’s name using any credit cards saved to the primary client’s profile.
- A tooltip has been added next to Net Balance if there is more than one available payor on file for the primary client. It explains that the Net Balance displayed is relative to the payor:
- When recording a payment, the payor dropdown field will not automatically display all of the payors on file for the primary client, rather only those currently carrying an outstanding balance owing
- The payor dropdown will always include the primary client, even if they have no balance owing since the session being paid has been booked in their name

New Settings & Updates to Default Bill-To Functionality
Since the feature overlaps with, and in some ways changes, the nature of the existing Bill-To setup in Circle of Care, some additional configuration options have been provided to better support each clinic’s invoicing preferences. To accommodate the Split Session Charge functionality, the Owl invoices have been updated to make room for a Payor column.A new setting has been created in Settings > Practice Details > Financial Documents called “Display Payors on Invoice”. This setting can be set to No or Yes:

If you choose No, the Payor column will not be displayed on any invoices created for your account. If you choose Yes, the Payor column will be displayed on all invoices created for your account. The Payor column for charges that haven’t been split will display the Primary Client’s name:

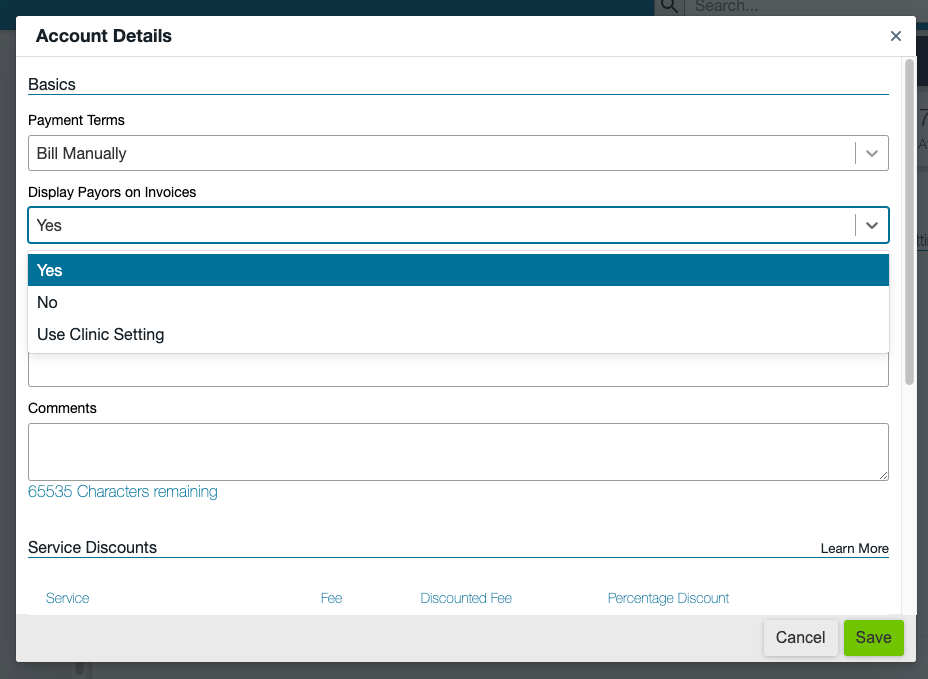
If you would prefer to have the Payor column generally not displayed on invoices, but have some clients for whom you would like to have it displayed, there is a setting that can be enabled on each client’s profile to supersede the practice level setting. To enable this setting, open a client’s profile and go to Contact & Clinical > Account Details and click the Edit button. You will see a new setting under the Payment Terms setting called “Display Payors on Invoices”. You will have three options: Yes, No, and Use Clinic Setting:
By default, all client profiles will be set to Use Clinic Setting, so clinics can easily update the practice level setting and have all client profiles follow suit unless otherwise updated.
It is important to keep in mind that a client profile cannot have more than one default bill-to contact. If you choose to change the default bill-to contact on file for a client, the former default bill-to will no longer be referenced as such on invoices going forward.
If a session has been split erroneously or assigned to the incorrect payor, you can use the Split Charges function again to correct this. For example, if a session has been billed to a default bill-to, but you want the charge fully under a different payor instead:
- Reopen the Split Charges window.
- Delete all payors but one, and select the intended payor for the full charge.
- Allocate the full charge amount to this payor.
- Click “Split Charges”.