Occasionally, you may want or need to delete a Client from Owl, deactivate them, or place them on a waitlist for your practice. This guide will show you to take all three of these actions in turn:
Deleting Clients
When you want to remove all record of a Client entirely from Owl, you will need to delete them. To delete a client:
- Head to your All Clients list.
- Press the checkbox next to the client name you are deleting, opening the green edit bar.
- Click the black trashcan icon.
- Follow the instructions in the popup to delete your client.
- There is a brief waiting period to delete clients, as deleting a client cannot be reversed, and deletes all records associated with the client.
Please Note: Only users with Owner level access to the account are able to delete clients permanently.
Deleting Duplicate Client Accounts
If you have entered a client to Owl twice, and now have duplicate Client Accounts, there is no way to merge the two together. As such, you will need to delete the extra client. To ensure that you are deleting the correct client, we suggest changing the name of the client who is going to be deleted to “DELETE, DELETE.” This way, when you are looking at your Client List you run no risk of deleting the incorrect Client Account.
Deactivating a Client
Instead of removing all traces of the client, you can also deactivate them. This will remove them from session scheduling, invoicing and so on, but still keep their data on our system if you need access to them (for instance, on Data Exports). To do this:
- Head to the Client Account.
- Under Contact & Clinical, switch to the Clinical Details tab.
- Click the blue Edit icon in the bottom right corner. On the window that appears, choose "Inactive" from the Status list.
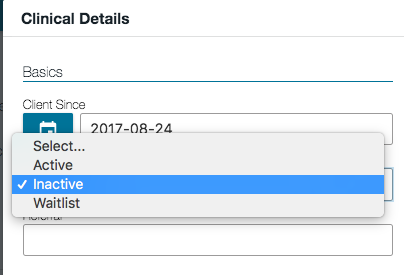
- Be sure to hit the green Save button to update your work!
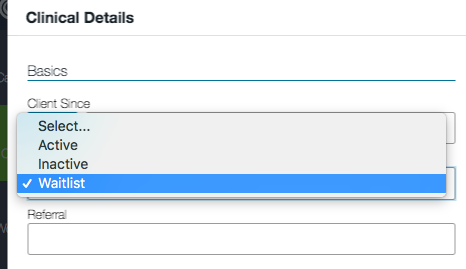
Creating a Waitlist
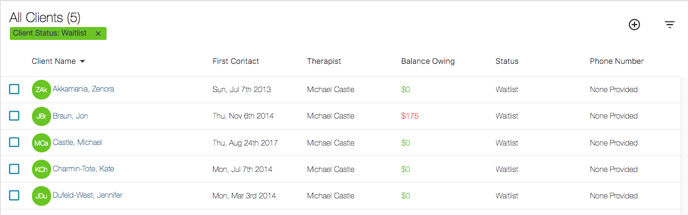
If you have enough clients to fill up your schedule, but you would like to maintain a list of clients for the future, you are more than welcome to set their status to "Waitlist." This is a status that works very much like Active and Inactive statuses are, with one main difference. When viewing your Waitlist clients, you will notice that this list is sorted by First Contact. This ensures that when you have space available, you can easily see the oldest client for contact. To add a client to your Waitlist:
- Under your Client list, choose their Client Account (you will first have to add the client in to Owl)
- Under Contact & Clinical, switch to the Clinical Details tab.
- Click the blue Edit icon in the bottom right corner. On the window that appears, choose "Waitlist" from the Status list.