
This article reviews all the basics of creating a new Owl Form.
Find Forms Under the Manage Tab
You will find Forms under the Manage tab in the far left Owl bar, between Dashboard and Settings. Head here to get started and click into the Forms section.Keep in mind that Solo users have full access to this area. For Group practices only practice owners and office admins will have access to Manage, therapists will be unable to access this area.
If you cannot see the Manage tab, you have not yet upgraded to the Client Portal! Contact us to begin using the Client Portal today.
Create a Form
To create a new form:- Click into the Manage section.
- You will see a list of all of the forms you have created.
- Click the + Icon in the top right area of the window to open the Forms Editor and start a new form
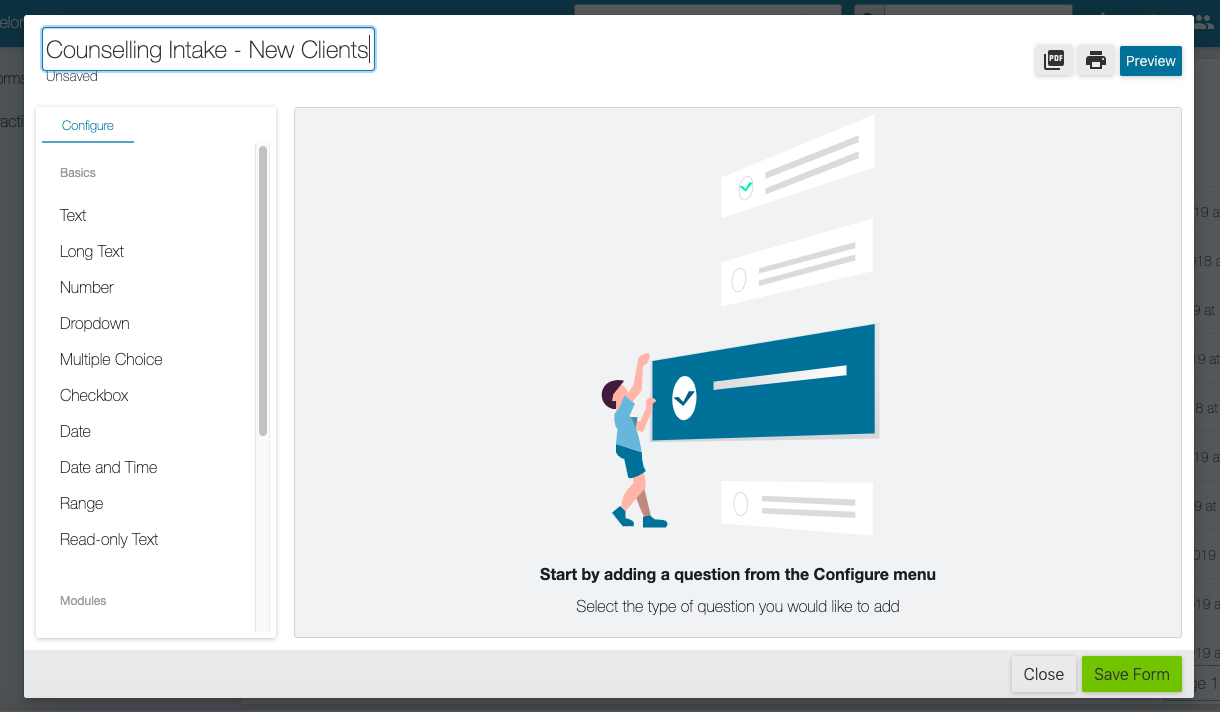
- You will need to give your form a Title:
- You can scroll through the Configure panel on the left hand side of the page to start building your form with various elements
- Basics - Add questions to your form
There are a variety of question types that can be added to the form such as long text, drop down, multiple choice, checkbox, and more. The questions you add to the form can be mandatory or optional depending on the question and your requirements of the client when completing the form.- Text: allows an answer in text format in a single line text box.
- Long Text: allows an answer in text format, but offers a larger text box to fill in.
- Number: allows a numeric answer.
- Dropdown: allows one answer to be selected from the preset options in the dropdown menu.
- Multiple Choice: allows multiple answers to be selected from the preset options listed out.
- Checkbox: allows one answer to be selected from the preset options listed out.
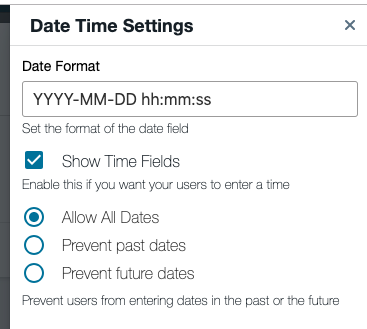
- Date: allows one date to be selected or entered.
- Date and Time: allows one date and time to be selected or entered.
- Range: allows one answer to be selected on a sliding range.
- Read-only Text: does not allow an answer, but displays informational text instead. (Please note that you will need to use your device's keyboard shortcuts to paste any text in this field).
- To add a question, simply click on the type you want from the sidebar and it will be added. You can write the question then click on the "Customize" button in the lower section of the question if you need to add options for the answers to multiple choice, drop down, or checkbox questions.
- You can also click the "Customize" button to manage the formatting or limitations for questions.
- Basics - Add questions to your form
- Modules - Add Additional Unique Aspects to your form
There are a variety of modules that can be added to your form to better customize it to suit your needs. The module options offered are:
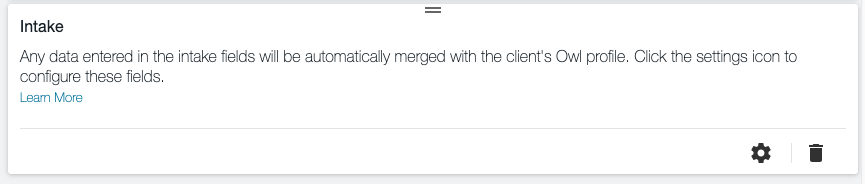
- Intake
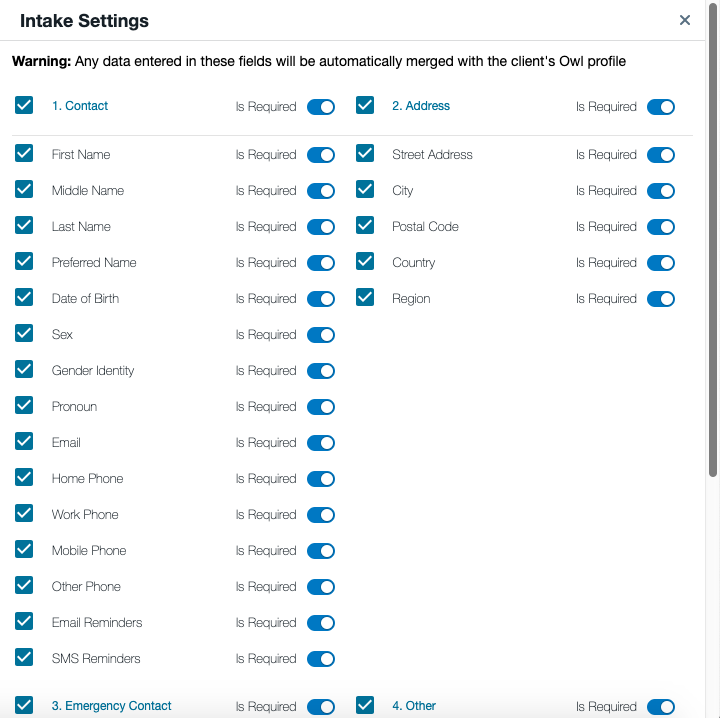
Clicking this module will automatically add it to your form. Any intake information that client’s provide when filling out the form will be logged to their client profile directly in Owl. - You can click the Gear icon in the bottom of the panel to customize the intake information you want clients to provide. The Intake Module is organized into four sections: Contact, Address, Emergency Contact, and Other. By default all of the intake components have been selected and set to Required.
- Simply uncheck the checkbox next to any intake item you do not wish to include in the form. If you do not want to include any questions from one of the sections, simply click the checkbox next to the section title and all items under that header will be unchecked. You can also use the Is Required? Option to choose whether the information requested is mandatory or optional for clients to provide.
- Agreement & Signature
Clicking this module will allow you to prompt the client for their electronic agreement and signature acknowledging any terms you’ve outlined in the text field provided and verifying that the information they’ve provided is accurate. - Address
This module can be used to prompt the user for any additional addresses you’d like to know about. Please note that the addresses provided by your clients in this module will not be saved to the client’s profile. You must use the Address fields in the Intake module if you want to have an address saved directly to the client profile. - Phone
Similar to the Address module, the Phone module can be used to prompt users for additional phone numbers you may need to request. Please note that the phone numbers provided by your clients in this module will not be saved to the client’s profile. You must use the Phone fields in the Intake module if you want to have a phone number saved directly to the client profile. - Terms and Conditions
This module can be used to add in a Terms and Conditions component to the form. It is a section element that allows you to outline your clinic and service policies in full for clients to review and agree to before completing the form.
- Intake


- Page Elements - Add Unique Elements to your form
There are two new page element concepts we’ve introduced into forms:
- Section
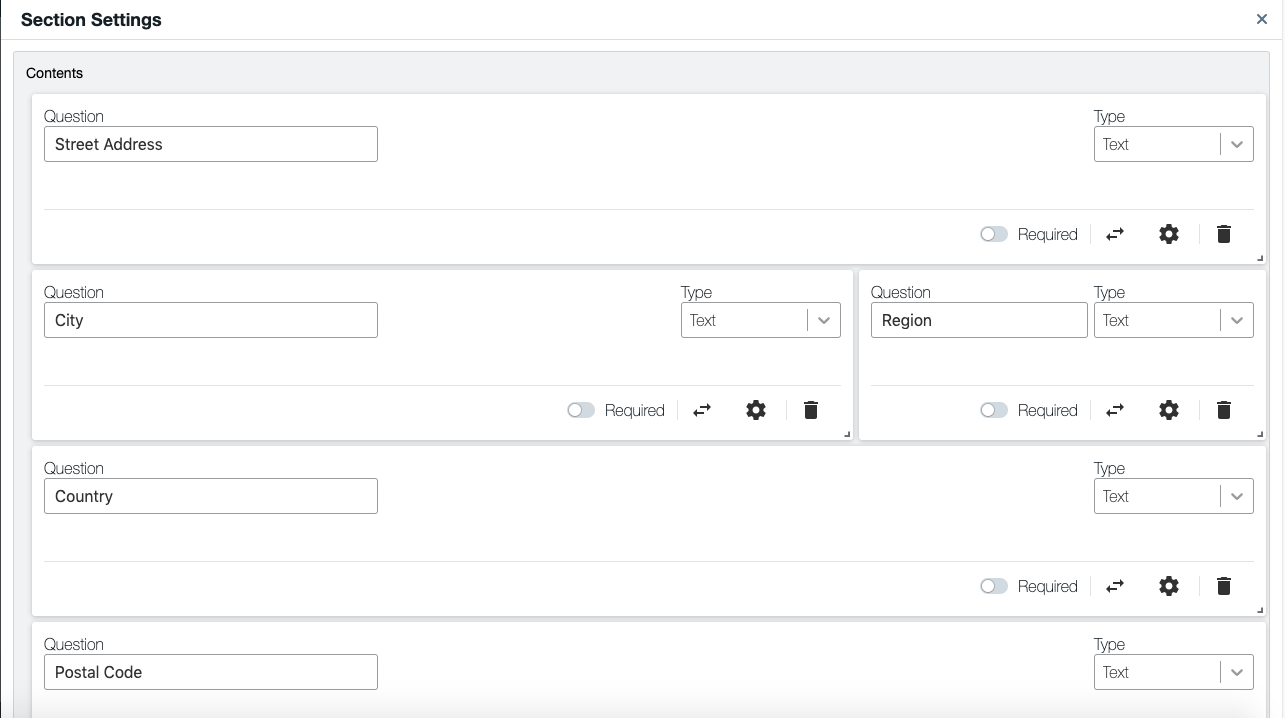
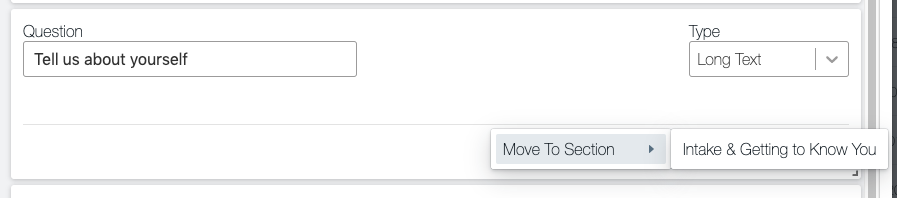
This element will allow you to create unique sections within the form and group questions within it. You can click the Section page element to add it to the form and then create a section title. Questions you’ve added to the form can then be moved into the section by clicking the arrow icon and then selecting a section to move it to:
Once the questions have been added into your section, you’ll be able to see how they’re arranged within that section by clicking the gear icon on the section element:
You can click the gear icon on each question to continue editing it if needed. You can also click a question in your section and drag and drop it to reposition it in relation to the other questions. - Page Break
This element allows you to create where you’d like the page breaks to happen for longer forms. If you regularly print out or generate PDF copies of the form, you can use the page breaks to ensure that the form is laid out the way you prefer for printing.
- Section


After you’ve reviewed the form, simply click the Close Preview button shown along the bottom of the preview. You can continue editing the form if you wish, or if you’re done creating the form you can save it by clicking the Save Form button at the bottom of the window. If you would simply like to exit from the form, click the Close button. You will be taken back to the listing of all the forms already created or in progress and the most recent version of the form you saved will be listed there.
If you haven’t saved the form at all during your editing process and you click the Close button you will be prompted to save the form or close without saving a copy of the form you’ve created:

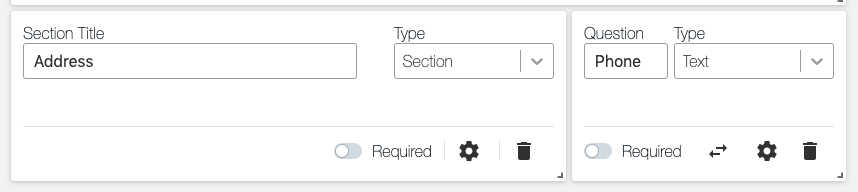
Another helpful editing tool we’ve added is the ability to change the width that some of your questions and modules take up on the form. If you’re asking for a phone number for example, you may not wish to take up an entire line on the form. You may prefer to compress it and add another question into the same line to conserve space. You can do this by clicking on the bottom right hand corner of the item and dragging your mouse to reduce the width accordingly:
This saves space on the form and allows for a more horizontal layout of questions, so the form doesn’t start to feel too long for users, or so that very short questions no longer take up one whole line of unnecessary space:

Once you have created your form, you are ready to Edit Your Forms Settings.